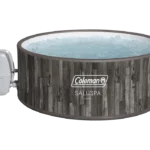
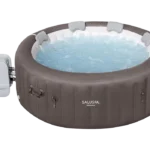
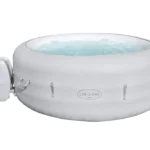
Assembling your SaluSpa hot tub can seem daunting at first, but setting it up is straightforward with some direction. If you get a SaluSpa to relax in after a stressful day or for hydrotherapy, then it is important to install it properly so that you get an experience full of safety, efficiency, and effectiveness. This installation guide on how to set up an inflatable SaluSpa hot tub reviews each process of assembling it while focusing on key tips, safety precautions, and water treatment procedures to observe.
1. Choose the Ideal Location
Choose the place where you set up your SaluSpa hot tub. It must be on a stable flat surface that can take the strain of supporting not only the hot tub itself but also its user and all the water weight inside. The area must have an outlet within 12 feet͏ of distance͏. The outlet should be grounded and have a Ground Fault Circuit Interrupter (GFCI). Do not use extension cords as this would introduce safety problems.
Remove all sharp objects from the surface, and make sure there is proper drainage. Do not install under direct sunlight so as to preserve the spa liner when installed outdoors; adequate ventilation must be observed when installing indoors to avoid moisture buildup.
2. Unbox and Inspect Components
Once you have picked the right spot, unbox the SaluSpa, and look through all its components like Spa liner, pump unit, inflatable cover, ChemConnect chlorine dispenser, filter cartridges, inflation hose, instruction manual. Carefully examine whether any parts are either broken or missing. This will prevent wasting time and unnecessary hassle as you have to ensure all parts are present.
3. Inflate and Assemble the Spa
The SaluSpa, as stated before, comprises an inflation system. Consequently, first, join the inflation hose with the spa liner and pump, turning on and activating the procedure for inflation. The hot tub should be neither under-inflated nor over-inflated since excess pressure may seriously harm the seams. Once this spa is inflated, you should connect the provided hoses from the pump to it.
Install the filter cartridge in the pump housing. This is pretty important to make sure filtration starts as soon as the spa is filled with water. Don’t use the pump – and certainly don’t use the spa – until you have a filter correctly installed.
4. Fill with Water and Power Up
Now all these parts had put together, let’s fill the tub up. Get your garden hose and start filling up the tub to “recommended water line” marked on the inside wall. Actual filling time is generally one to two hours depending upon your water pressure.
Once filled, plug the power, and switch on to cycle on the control panel for water heating. You may also initiate the AirJet system with this application. It shall take around 12-24 hours before the water comes to an optimum temperature of 100°F-104°F (38°C-40°C). And if you are in a climate where it gets below freezing, then go ahead and use the Freeze Shield™ automatic heater.
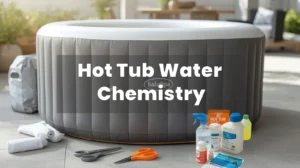
5. Initial Filtration and Water Treatment
Balance the water before use. Run the filtration system through one complete cycle of water circulation, which may take 8–24 hours.
Then, insert the ChemConnect chlorine dispenser into its spot. Put in the right amount of chlorine or bromine tablets. Use test strips to ensure ideal chemical balance in your SaluSpa:
pH: 7.2 to 7.6
Alkalinity: 80 to 120 ppm
Chlorine: 1 to 3 ppm
Shock the water with chlorine-based spa shock. Eliminate any contaminants. Check regularly and adjust levels, if required, using pH increasers, decreasers, or clarifiers.
6. Energy Saving Tips & Safety Best Practices
Keep your SaluSpa running efficiently always. When not in use always cover it because the insulated cover retains heat, cutting down on power consumption. Use the timer function to schedule the heating up during off-peak hours of the energy flow.
Keep children and pets away from the spa at any time unsupervised. Test GFCI plug before every use of the appliance. Do not use the hot tub while under the influence of alcohol or drugs. Do not let the user stay in the water for more than 15 to 20 minutes; this may lead to hyperthermia or dehydration.
7. Troubleshooting Common Issues
Even with proper setup, issues may arise. Here are some common SaluSpa problems and solutions:
Spa not heating: See that the filter is free and the heater’s on. Check still water at the right level.
Cloudy water: Poor water chemistry or dirty filters. Shock the water and replace the filter.
AirJets not working: Ensure the AirJet button is activated and the pump is connected properly.
Error codes:Refer to the manual for specific codes. Reset the control panel if needed.
8. Draining, Cleaning & Storage
Attach the garden hose to the drain valve. Let the water empty completely. Use a soft cloth and mild soap in cleaning the spa liner and pump housing.
Allow all components to dry COMPLETELY before you let the air out of the spa. Do not fold or store if it is wet; this can cause mold and mildew. Keep the unit in a dry place that is shaded from the sun and also where there are no freezing temperatures.
Conclusion
Correct setup makes the SaluSpa hot tub ready for use. Choosing the right place, filling up the spa, treating the water inside it, and eliminating all problems will guarantee safety and add more fun. Be sure to observe all safety rules by maintaining proper water chemistry and keeping your spa covered to retain heat in it so that energy is conserved. Maintain your SaluSpa well so that it lasts long enough through many seasons providing lots of relaxation and enjoyment.